How To Guides
How to Steam Milk – Our Guide to Milk Steaming
Before you can create those wonderful latte art designs you dream of forming on top of your coffee, you need to steam the milk to create the frothy, creamy texture.
In this post we break down the steps involved with milk steaming, pinpointing areas which can negatively impact on how your final drink turns out and provide a structure that you can follow and practice to help improve your barista skills.
Although it can often be over complicated, in reality milk steaming is a quick, simple process that constitutes:
- Adding heat to the milk
- Introducing air to the milk (also known as stretching/foaming)
- Texturing (breaking down the bubbles to create a smooth microfoam)
It’s important to portion your milk out correctly. If you use too much or not enough, you’re going to have a harder time controlling the steaming process and pouring.
Step 1 – Positioning the Milk Pitcher
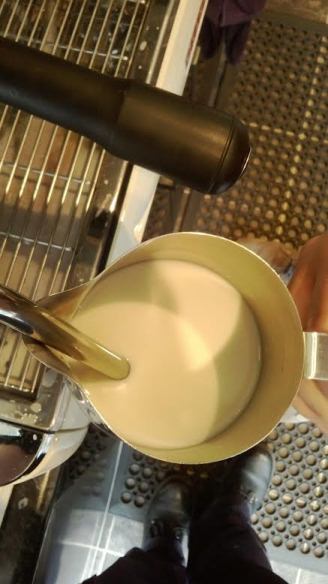
Before submerging the steam tip, purge the steam wand to get rid of any existing condensation. This occurs when the steam tip is cool whilst it hasn’t been in use. With the milk in the pitcher the steaming process is commenced by positioning the steam arm straight down and slightly out from the machine. The best steam tips are designed with holes that work at a 45 degree angle when pointed down, which gives the best texture to the finished milk.
Ensure the tip of the steam arm is fully submerged underneath the surface of the milk. If the tip is too shallow, when the steam is turned on milk will spit everywhere and an uncontrollable amount of air will be added. Too deep though, and the steam won’t have enough power to circulate the milk properly.
Adjust the position of the pitcher so the steam arm is slightly off to one side and to the front of the pitcher, in between the centre and side- this will force the steam to create a swirling vortex.
Top Barista Tip: Use the pitcher spout to rest the steam arm in the milk, as this will give you much more stability and control.
Step 2 – Turn on the Steam
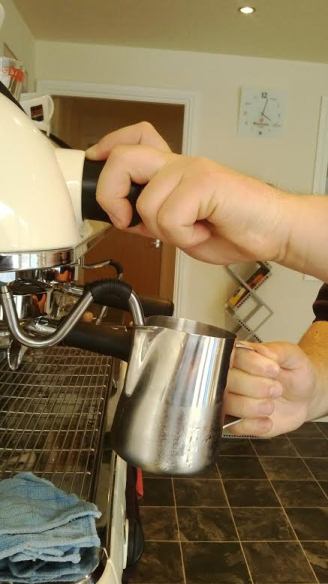
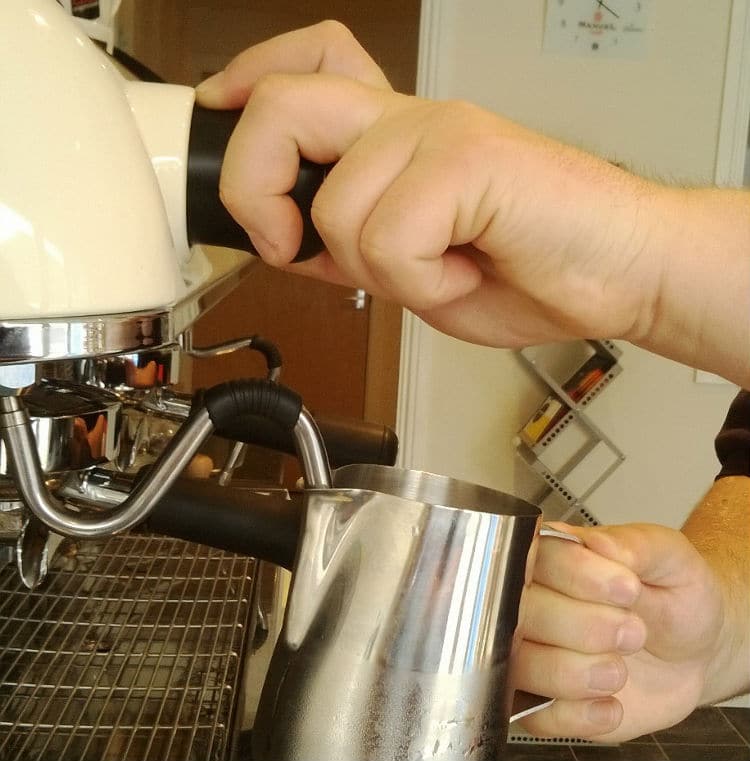
Submerge the steam tip and with one hand, hold the milk pitcher handle, with the other hand turn the steam arm on to introduce the power. Usually half a turn of the steam knob is enough, move this hand to feel the temperature through the side of the pitcher.
At this point you should start to see the milk spinning in a vortex around the pitcher, but at the same time there should be no air going into the milk. If you do notice air introduction, slightly lower the steam tip into the milk by a few millimetres. If the milk isnt spinning, the steam tip maybe a little deep and too close to the centre of the milk.
Step 3 – Control Air Introduction
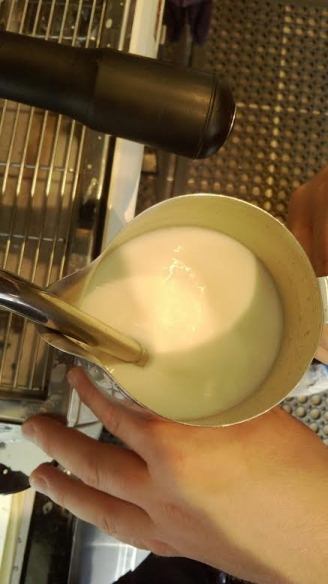
To introduce air into the milk, gently lower the milk pitcher to move the steam tip nearer to the surface, where it will suck air into the milk. The air needs to be introduced at a slow rate, or else the big air bubbles that are introduced won’t get broken down into a silky smooth foam texture.
You should hear a ‘chirping’ sound as small amounts of air are introduced, too heavy a sound and you will introduce a lot of big bubbles that won’t be able to break down.
As the air is introduced, the volume of milk will expand, so the pitcher needs to be constantly lowered to counteract this action. If not, the steam tip will become too submerged to add any more air, and you won’t reach the required amount.
To stop the addition of air, a very simple little lift of the pitcher is needed to submerge the steam tip slightly, stopping it from sucking more air into the milk. Be careful not to push it too deep, and keep the position of the steam arm exactly as you have done from the start.
For latte style milk, you only need to add a few chirps of air, however for cappuccino, the more air the better. You will still be adding air gently, just for a longer time. As a rule of thumb, add air until you feel a good warmth through the pitcher, or at around 45 degrees celsius if you are using a temperature probe.
Top Barista Tip: Some cafes will move the milk pitcher up and down several times during the steaming process- ignore this as it creates uneven and badly textured milk. Keep the action of your steaming as smooth as possible, with the only action you should need to create perfect milk is a slight lowering and lifting of the pitcher.
Step 4 – Texturing the Milk
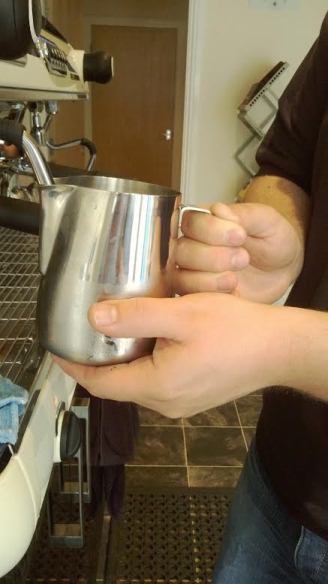
Texturing the milk ensures that the air that you have introduced is broken down to a silky smooth consistency distributed evenly throughout the milk. If you don’t texture, you will end up with lumpy, bubbly froth on top of liquid milk.
The position of the steam tip should be the maintained from step 3- just submerged, creating a vortex in the pitcher. All you have to worry about now is temperature- when the milk pitcher becomes too hot to touch, remove your hand from the side of the jug to avoid burning, wait a second or two and turn off the steam completely. Remove the pitcher from the steam arm, or if using a thermometer, turn off the steam at 50-55 degrees celsius (thermometers have a slight delay)
This should give you milk around 65 degrees celsius. At this temperature the milk will be hot, sweet and silky in texture, not quite mouth-burning or lukewarm either, just right. The milk is sweetest at this temperature because lactose (the sugars in milk) dissolve best at this temperature. If the milk is steamed too hot it will smell eggy, form large bubbles on the surface and the foam will become lumpy and separate from the liquid milk at a fast rate.
Top Barista Tip: as soon as the steam is turned off and the milk pitcher is removed, clean the steam wand. This is done in two steps- wiping the steam wand and purging. If done correctly there should be no build up of milk and the steam arm should stay clean for years.
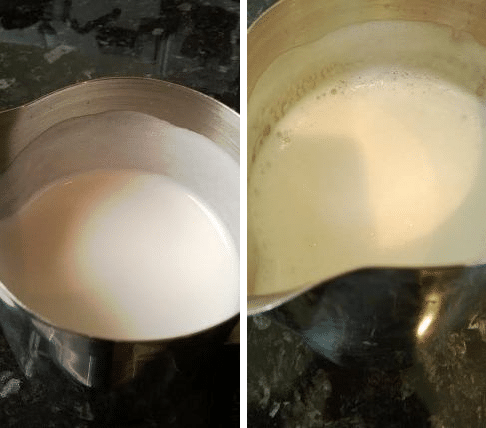
Finally – The Tap and Swirl
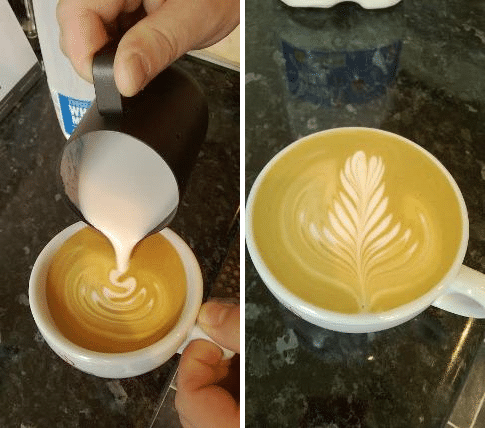
If you’ve got a couple of little bubbles here and there you can just get rid of those by just tapping the pitcher on the counter. Before pouring, swirl the milk around in the pitcher to re-introduce the foam back into the liquid milk, the texture should look glossy like melted marshmallow.
The proof of the how well the milk has been steamed is in the pour. It should pour evenly and smoothly with a good depth of foam. Well steamed milk is Ideal for latte art, so once you’ve mastered how to steam milk then take a look at our guide to pouring a latte art rosetta where we break down the all important stages in drawing that perfect rosetta.
If you’d like to learn first hand how to improve the milk steaming process from one of the countries leading barista trainers, come and join us on our next Barista Training course.


